Dev Diary November 25
Hi hacknplanners,
Today, we present a new update for HacknPlan v2! I must start saying this is a “boring” update, meaning it doesn’t touch very relevant modules of the application, such as the kanban boards, design model, or metrics. However, you will be able to experience a glimpse of the new HacknPlan v2 UX, the quality of life improvements, even in the small things. Also, we built a good amount of reusable components that will be widely used in the rest of the application for a consistent experience, and will allow us to release new features and migrations faster.
This release is focused on project administration. We have migrated 8 project administration modules to v2 –leaving the rest for a future update– and the goal was to make customizing and managing the project easier, especially for large projects with a lot of data. We opted for a table-based approach to these admin panels, making it easy and intuitive to create, sort, select, edit, and delete data. We also reduced modals and focused on inline editing as much as possible.
Additionally, we are fully committed to making HacknPlan accessible to everyone, and that’s why, from this point forward, all v2 modules will be available in 9 languages! More on that later.
As you probably already know, these v2 modules are optional and disabled by default, to make sure you are not disrupted in the middle of your development cycle, and you can embrace the new version at your own pace.
Without further ado, let’s dive in!
🧭 Project administration
General
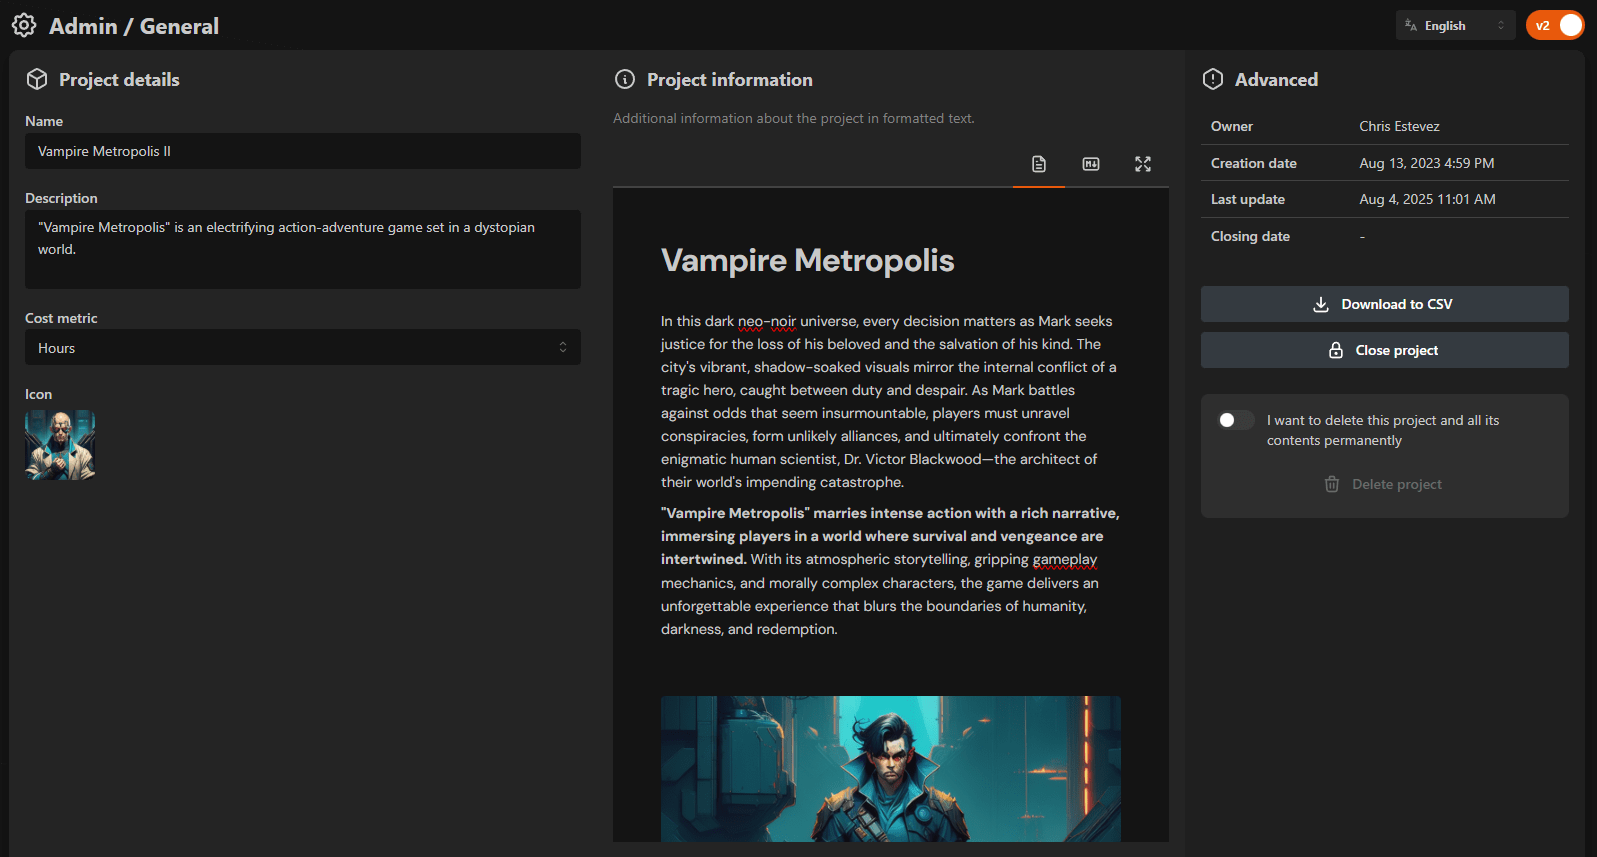
The General Administration module allows you to modify general information about the project, such as title, description, cost metric… In that regard, there is not much new in this module, except for the new formatted text editor.
A WYSIWYG text editor has been one of the most requested features we’ve been receiving over the years, and we are so pleased to finally provide a much better user experience for text and documentation. This is a modern and efficient editor that supports both a block-based rich text editor with slash commands and a Markdown editor, all in one, fully compatible with the existing markdown data stored in our system. We will give more details about the text editor at the end of the post.
Besides the new editor for the formatted project information, another new thing in this module is the “Download to CSV” button, which allows you to download your project data in CSV files. This option has always been available at Administration ➡ Data, but we have moved it here for simplicity (the Data section will eventually be removed).
Users & permissions
In the Users & permissions module, you can add and remove users from your project, as well as edit their permissions.
As we mentioned earlier, for project administration, we are taking a table approach in v2. With this table, you can drag and drop, multiselect, edit, delete, and sort by different fields… both using the mouse and keyboard. You can even multiselect several rows by drawing an area with the mouse, which is a really cool improvement over v1. We explain all the features of this table below.
What are the new features in this module? First, in personal projects, you can now set the permissions of the users directly in the invitation panel. This saves you time, so you don’t have to invite some users and then go one by one, setting their permissions when they enter the project.
Second, you can now manage the pending user invitations, allowing you to revoke them if necessary.
Boards & milestones
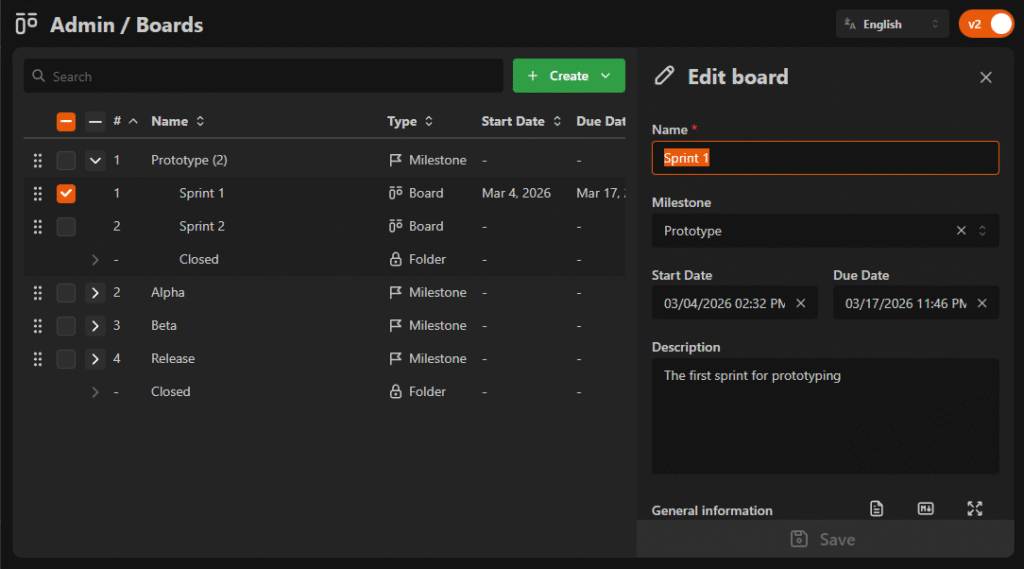
The Boards & milestones module allows you to manage the structure of milestones and boards in your project. With this new version of this module, it’s easier to create, edit, close, delete, and move around boards and milestones. The module, again, uses our new table to manage data with all its benefits, in this case being displayed as a tree table, with rows inside rows. This is very convenient to easily visualize and manage the structure of milestones and boards of your project.
Besides the WYSIWYG editor we mentioned before, another quality of life improvement in this module is the new date input. Adding and modifying dates in v1 could feel a little clunky and very mouse-oriented. With this new component, we wanted to simplify date range manipulation and make it easier, faster, and more intuitive for both mouse and keyboard-oriented users. This new date input allows you to enter the date by using the keyboard, being able to move between date parts, and change the values using the keyboard keys. Also, clicking on the field opens a date/time range selector that makes it super easy to set a range using the mouse.
Other modules
We also migrated the following project administration modules:
- Categories
- Design Model Types
- Stages
- Importance Levels
- Tags
These modules don’t have special features; they just use our admin table to easily manage those project administration entities in a much more efficient way.
🧩 The Admin Table
Our admin table is the core component of most of these new project administration modules. We wanted to provide an easy, intuitive, and efficient way to manipulate potentially large amounts of data, which is consistent among all the modules in the application. This component won’t only be used here, but also in modules like the game design model, and we also plan to introduce a table visualization of work items for boards, so you would benefit greatly to learn all the features and tricks of this table to get the most out of it.
Search
The table comes with a search field that allows you to quickly find what you’re looking for. Instead of filtering the content of the panel like in v1, this search field allows you to quickly iterate among the results of your search (by pressing Enter or Shift + Enter), and then quickly focus on the selected result by pressing the arrow down key. This is very convenient when you want to be very productive and use the keyboard to manipulate the table.
You can focus the search field anytime by pressing Ctrl/**⌘** + F.
Mouse edition
The mouse edition of the table is very intuitive, but here it is a comprehensible list of all you can do:
- You can sort the table by the columns that support it, just by clicking on the column header. Clicking consecutively toggles the sorting between ascending and descending. There is a special column, when the table supports manual sorting, with the symbol #. This column represents the manual order of the row, so if you want the table to be sortable using drag and drop, this column should be clicked (it is active by default).
- When the list allows manual sorting, you can rearrange the items by the drag handle in the first column of the table. You can also drag multiple items, just by dragging one of the items in a multiselection. Note that, as we said before, for the rows to be draggable, your table must be currently sorted by manual order (the # symbol on the header).
- If the table supports selection, right after the drag handle, there is the selection column. This column contains a checkbox that represents whether the row is selected for editing. You can click on it to add or remove the row from the selection, or click on the checkbox on the header to select/unselect all.
- Another way to select multiple rows is by selecting an area with the mouse, exactly like you would do in the file explorer of your operating system. This is very convenient and intuitive, and is a usability improvement that will be implemented extensively in v2 for multiselection.
- To edit a row, if supported by the specific table, you just have to click on it, and it will open the side panel for editing. Most modules also support inline editing of the row directly on the table, which can be triggered with a double click.
- Clicking in the table outside any row will clear the current selection.
- The last column of the row, if the table is editable, is for action buttons. Here you can delete the row or perform some other actions available.
- When the table is a tree (it contains rows inside rows, like the Boards & milestones module), there is an additional column for expanding and collapsing rows that support it. The one in the header expands/collapses all. Additionally, you can click the right mouse button anywhere in the row to expand or collapse it.
- When the table is a tree and you are dragging one or more rows, perhaps you want to drop them inside a row that is currently collapsed. In this case, just putting the mouse over the expand/collapse button of the row for a few milliseconds will expand it.
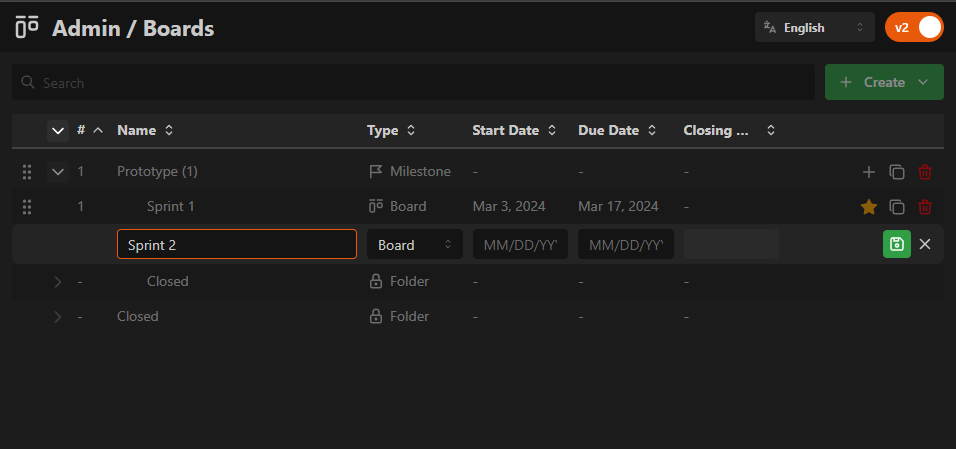
Inline edition of table rows
Keyboard edition
For those who like being super productive and live by keyboard shortcuts, our table has been designed to be completely usable using just the keyboard. You can navigate through it, expand/collapse rows, edit them, move them, select them, and delete them easily. For project administration modules, this means being able to make changes quickly and efficiently, which is especially relevant for big projects.
This is a list of all you can do:
- Navigate the table by using the up and down arrow keys, and also expand or collapse the rows that support it by pressing the right and left arrow keys, respectively.
- You can select the focused row for editing by pressing
Enter(this will replace any other selection). If you want to multiselect, you can by pressingSpace, which adds/removes the row from the current selection. - If you want to edit the focused row inline, you can by pressing
F2. - You can also multiselect by pressing
Shift + Up/Downarrow keys, as you would do in a file explorer. - Pressing
Ctrl/**⌘** + Aselects all the rows in the table. - Pressing
Escapeclears the current selection. - Now that gets interesting: if manual sorting is supported for the table, you can move rows up and down by pressing
Ctrl/⌘ + Up/Down. If you are a keyboard person, this makes sorting the rows very efficient. - What about adding new rows? You can add a new inline row before, after, or inside the focused row (when supported), using the following shortcuts:
Ctrl/**⌘** + Enter: Adds a row after the focused row.Shift + Enter: Adds a row before the focused row.Ctrl/**⌘** + Shift + Enter: Adds a row inside the focused row, if supported.
You can get a contextual guide of these shortcuts in-app, by pressing H on your keyboard anywhere in the v2 modules.
🌍 Localization
As we mentioned before, HacknPlan v2 will be fully localized to multiple languages. Currently, the following languages are available for v2:
- English
- Spanish
- French
- Polish
- German
- Portuguese
- Italian
- Japanese
- Mandarin
![]()
Edition modal in Japanese
Bear in mind that these translations are currently local to the new v2 modules, so other things as default admin entities (categories, stages…), notifications, emails, and other modules, are not translated yet.
We are committed to releasing the full HacknPlan v2 in these 9 languages, but we are open to adding more languages if there is a demand for them. Also, if you find any issues with any translation, please let us know by dropping a support ticket, and we will fix it right away.
You can switch languages using the dropdown in the top-right corner of the v2 modules.
✍️ Text editor
We are so glad to finally release the first version of our WYSIWYG editor, which, as I said it’s been heavily requested. We wanted to make sure everything is backwards compatible, since this v2 migration is being done in parallel to v1, and we created a dual WYSIWYG/Markdown editor with full-screen support.
Right now, what we released is a lite version of what the editor will be. Currently, the following blocks are supported in the WYSIWYG editor:
- Text styling, including:
- Text
- Headings
- Bullet lists
- Ordered lists
- Blockquotes
- Inline code
- Code block with formatting in several programming languages.
- User mentions with @.
- Work item references with #.
- Design element references with %.
- Separator
- Tables
- Image uploads
- Image links
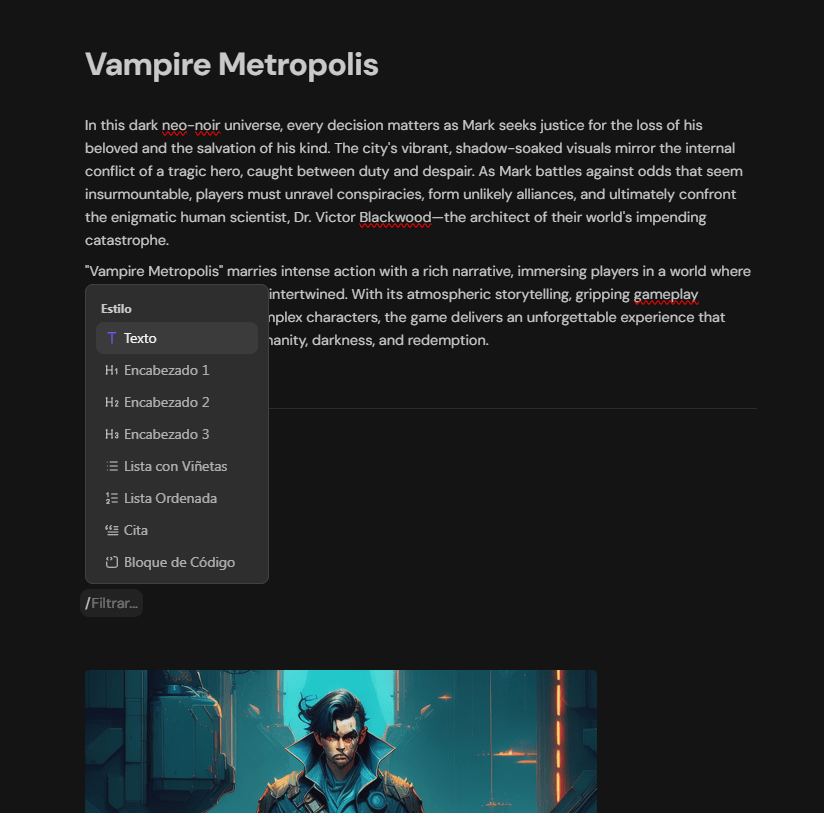
These blocks can be inserted by using slash commands and selecting them from the menu (using /), and some of them have keyboard shortcuts, like the mention and references. Also, the WYSIWYG editor supports Markdown shortcuts, so if you are used to Markdown, you can easily format your text by typing ## for a Heading 2, ** for bold, and so on.
Additionally, you can drag and drop the blocks in the editor using the drag handle that appears when the mouse is over a block, and clicking on that handle opens up a menu with some options for the selected block, like table manipulation, changing the block type, deletion, and more.
Last, but not least, selecting any chunk of text in the editor opens up a floating menu where you can format the text, like setting it bold or italic, making a link out of it, or changing it to another block type…
What’s coming for the text editor
This is just a tease of what the complete editor will be. Currently, it is being used to edit some minor text descriptions, but it will hit a new level when the Game Design Model or Kanban Board modules are released. The text editor for editing the descriptions of design elements and work items will have some extended features:
- Real-time edition: The editor will be fully working in real-time, meaning you’ll see how other users are editing the document at the same time as you, the cursor position where they are, and you’ll receive their changes immediately. This will fix the issue of users replacing other users’ content.
- More references:
- Attachments
- Project files
- 3D visualizer
- Export: An easy way to export descriptions in several convenient formats.
The Documentation module
If you read the roadmap post we published a while ago, you know we are releasing a fully fledged documentation module for HacknPlan, like having a Google Docs or Notion inside the application. The good news? We are moving this up in the priority list! The work in the text editor is going smoothly, and we are confident in releasing a first version before the end of the year.
The most relevant thing about this module is that it doesn’t need backward compatibility with v1 (it will only be released for v2), so we won’t be supporting the old markdown system. Why? That format, even convenient in many use cases, doesn’t allow many of the formatting options that are required to create advanced documents or reports. This opens up many possibilities in adding many advanced features that I believe you’ll love:
- Resizable images
- Resizable tables with advanced formatting
- Colors
- Advanced project blocks such as:
- Work item cards
- Design element cards
- Embedded metrics and charts
- Collapsible sections
- Alerts
- Video
- Mathematic formulas
- Inline comments
- Versioning with diff
- Emojis
- Import from files
- Table of contents
- AI suggestions
We are actively working on this, and you’ll hear news very soon!
Conclusion
We are glad to hit a new milestone on our road to HacknPlan v2. This might not be the most mindblowing update, but it surely set the ground for many other improvements down the line. We hope you enjoy the new project administration modules, and we can’t wait to hear your feedback.
Happy planning! 🧡